【Elixir】 Phoenix で LiveView を使ってみる
LiveViewを使ってバックエンドだけでリッチなフロントエンドを作成してみます。
【Elixir】 Phoenix で LiveView を使ってみる
今回はLiveViewを使ってバックエンドだけでリッチなフロントエンドを作成してみます。 Phoenix.LiveView — Phoenix LiveView v0.17.5
環境
- Elixir 1.14.2
- Phoenix 1.6.3
- LiveView 0.17.5
サンプル
こちらの参考ページを元に進めていきます。 Phoenix LiveView Basics :: Phoenix Beginner’s Guide
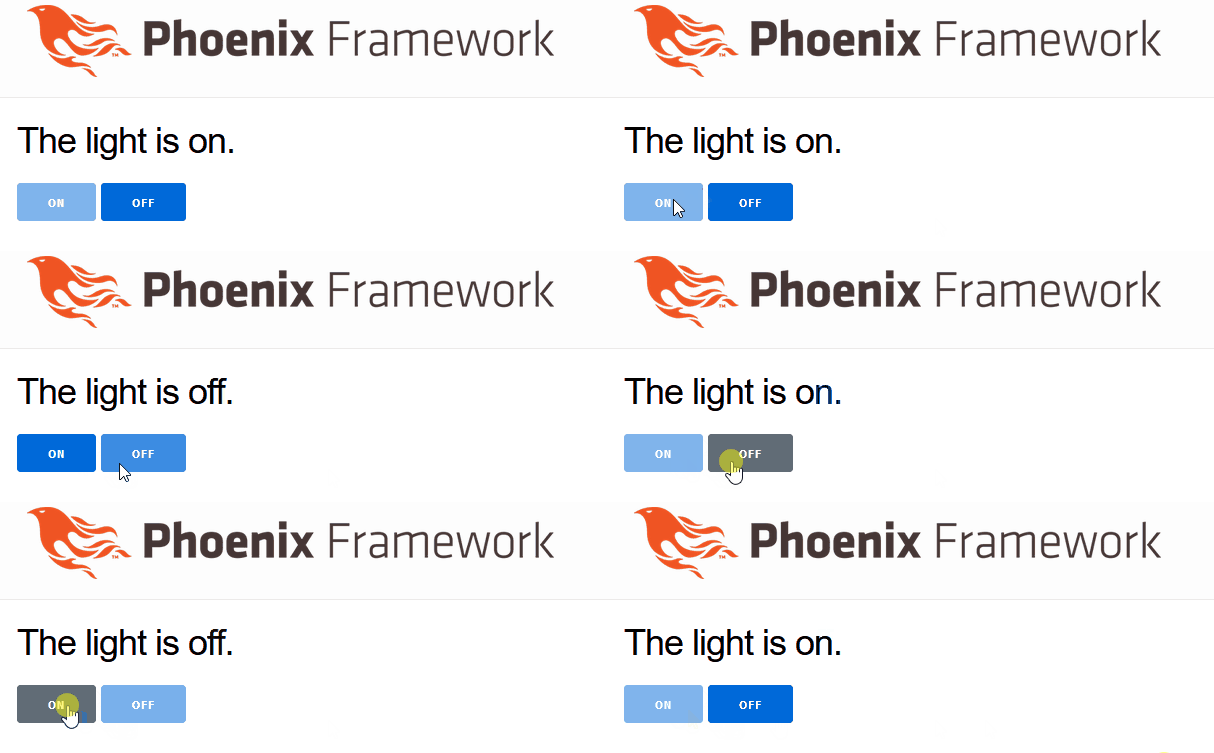
ON/OFFボタンを作成します。
phoenixプロジェクト作成
DB不要のため --no-ecto を付けます。
mix phx.new demo --no-ectoLiveViewの処理を実装
defmodule DemoWeb.LightLive do
  use DemoWeb, :live_view

  # 初期接続
  def mount(_params, _session, socket) do
    socket =
      socket
      |> assign(:light_bulb_status, "off")
      |> assign(:on_button_status, "")
      |> assign(:off_button_status, "disabled")

    {:ok, socket}
  end

  # 画面
  def render(assigns) do
    ~L"""
    <h1>The light is <%= @light_bulb_status %>.</h1>
    <button phx-click="on" <%= @on_button_status %>>On</button>
    <button phx-click="off" <%= @off_button_status %>>Off</button>
    """
  end

  # Onボタンの処理
  def handle_event("on", _value, socket) do
    socket =
      socket
      |> assign(:light_bulb_status, "on")
      |> assign(:on_button_status, "disabled")
      |> assign(:off_button_status, "")

    {:noreply, socket}
  end

  # Offボタンの処理
  def handle_event("off", _value, socket) do
    socket =
      socket
      |> assign(:light_bulb_status, "off")
      |> assign(:on_button_status, "")
      |> assign(:off_button_status, "disabled")

    {:noreply, socket}
  end
end
Routerへの追加
  scope "/", DemoWeb do
    pipe_through(:browser)

    get("/", PageController, :index)

    # /light のパスを追加
    live("/light", LightLive)
  end
確認
Phoenixサーバーを起動します。
mix phx.server起動後に http://localhost:4000/light に接続すると画面が出てきます。